After Das Vicky showed me how good the PSD file format is, I have now transferred this knowledge into the kit making one. (Note: You can also do the same thing with Paint shop pro's version PSP (Not Playstation Portable! ") )
)
Why use PSD or PSP format?
-With other formats you can't see the layers you created because they have to be merged upon saving. Thus if you find an error or want to update your kit you have to redo it!
-You don't need to create alpha channels if you want part of your image transparent. (This advantage isn't used here.)
-If your logos are too big or too small, with PSD/PSP format you can just change the logo layer (if you follow my tutorial) to what ever size you want.
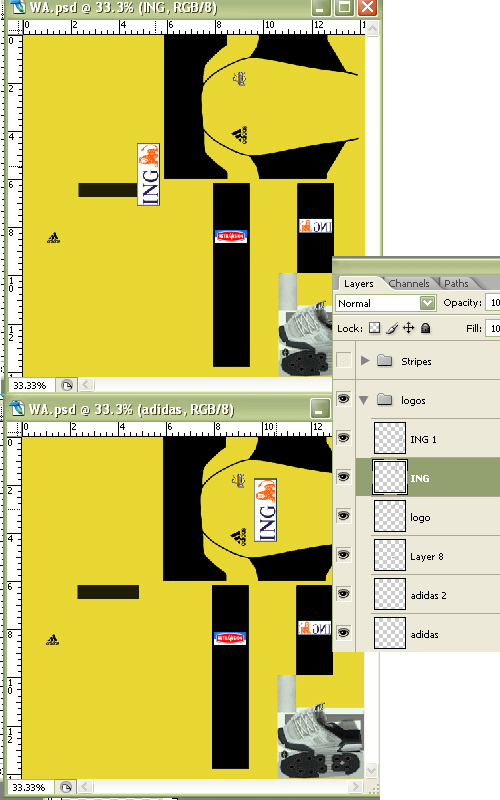
Example below is of my WA kit that was opened up a few weeks after I made the file! You will notice I still have my layers available and I can move the ING cup logo still. I didn't have to edit redo anything, just move the logo!
---------------------------------------------------------
Programs required
1.fshed005
2. Graphics Editor - Paint Shop Pro or Adobe Photoshop (I will be using Photoshop C2 and there will be some examples for Paint Shop Pro 9)
3. White Kit template
----------------------------------------------------------
Kit Editing tutorial begins!
1. Open the white kit template I plate I provided above.
2. Make a new image (ctrl + N)
3. Make sure your image settings are the same as below.
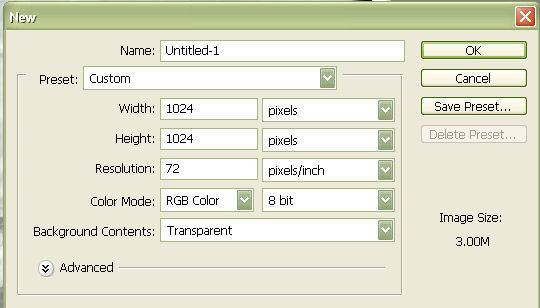
4. You now have a transparent 1024*1024 image.
5. Now go back to the white kit template you opened in (1). Copy and paste this image into the new image created in (3). (For Paintshop pro users paste it as a new layer.)
6. Create a new layer - Photoshop [Layer > New > Layer] (shift+ctrl+n) or Paintshop pro (Layer > New Raster Layer)
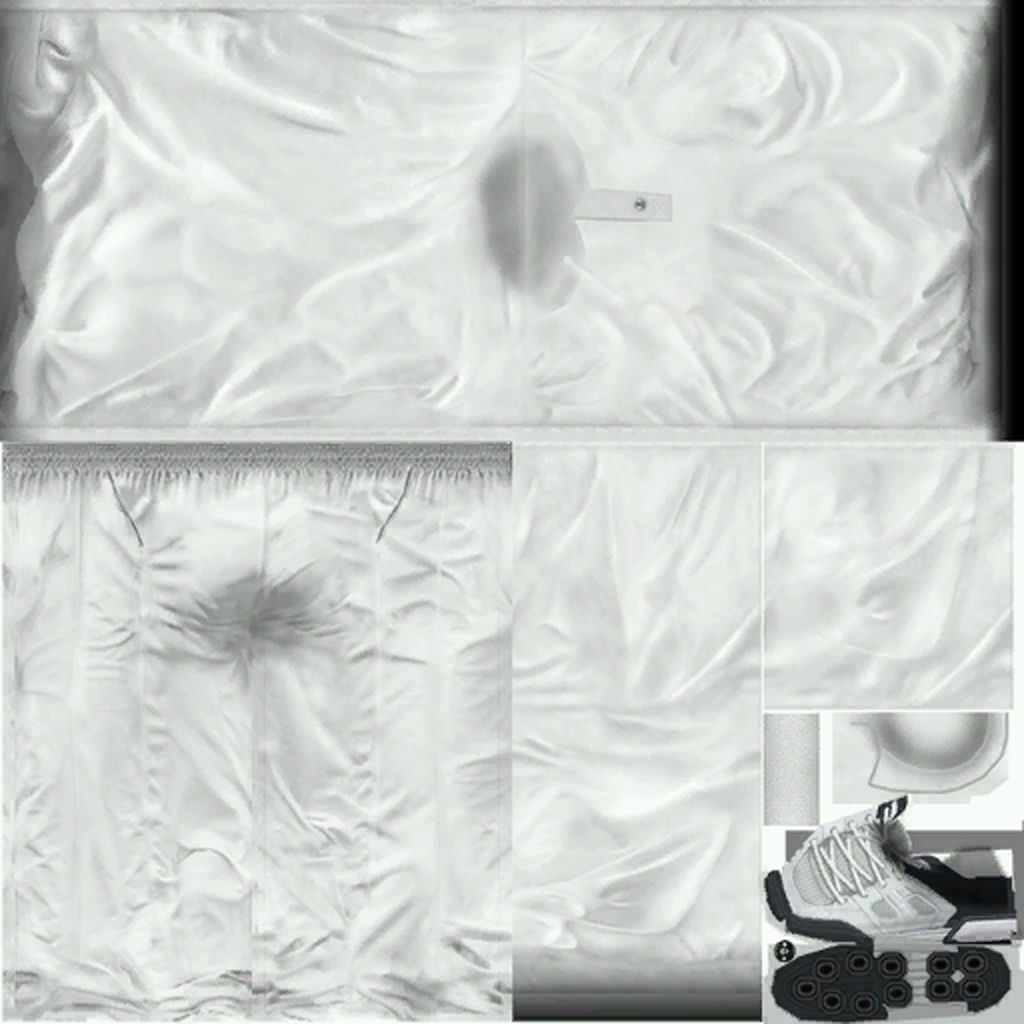
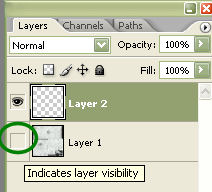
7. You will probably find it easier if you didn't show your white template. Click the eye as shown below. You now shouldn't have a eye for the white template.
Click here to show image
8. Click layer 2 or whatever you called your new layer you created in (6).
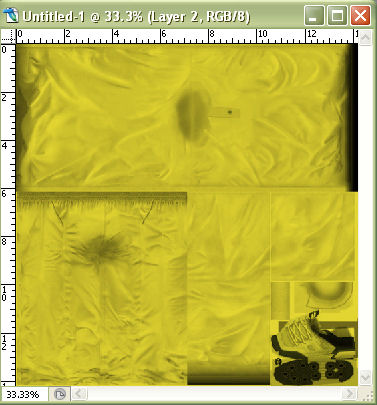
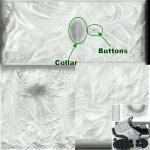
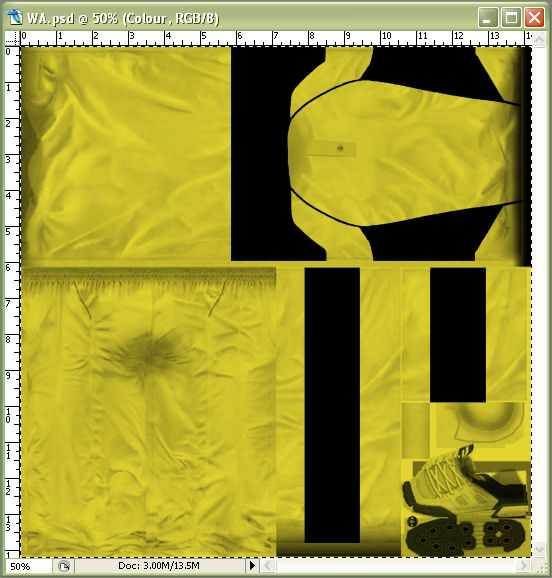
9. Use a paint tool to cover the new layer with the MAIN colour of your kit. You will also need to leave the shoes part of the image white. This is shown below.
Click here to show image
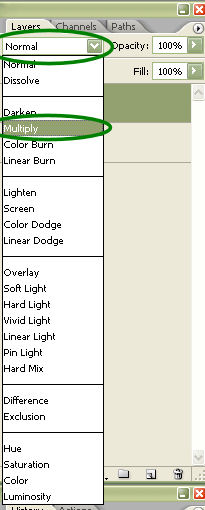
10. Change the Layer blending mode to "Multiply". For photoshop users there is an image below. For paint shop pro users go to Layer > Properties > Blend Mode = Multiply.
Click here to show image
11. Re-click the eye so that your white template shows like below.
12. You will want to rotate the image so that it is easier to put stripes or any other features your kit has.
To do this for Photoshop users, click the white template layer, Edit > Rotate 180. Then Edit > Rotate 90 CCW.
For Paintshop pro users, Image > Rotate > Free Rotate > Left and 270.
13. Click Layer 2 (created in step 6) and using your paint brush put on any stripes. This may take a while!
14. Do the opposite of what you did in 12 so that the image is at its original position.
Click here to show image
15. For placing on logos, just find the logo from a website and paste it onto your image. (Paintshop users just ctrl+L)
These will be new layers so you will have to rotate them until they appear in the correct direction. Once that is done resize it and position it where it should be.
16. Save your image as PSD (Photoshop), PSP (Paintshop pro Note: You need to type in .psp at the end of your file name.
You should also be able to save in either format in both prgorams. e.g Paintshop pro users should be able to save the file as a PSD and vice versa.
17. Open Fshed
18. Open the kit you are replacing
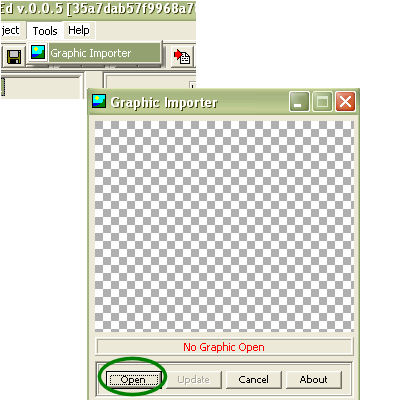
19. If you have installed the other image type plugin correctly you will have an option as shown when you click "tools" > Graphic importer should show up.
Click that and a box will appear. Click open.
20. When you click open the image below will appear. Change the image type as shown and find your image you saved in step 16.
21. Save your new fsh file as the same name as when you opened it.
22. You're done!
Click here to show final image
House keeping
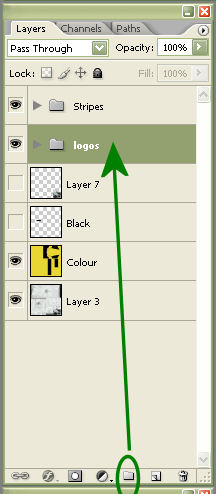
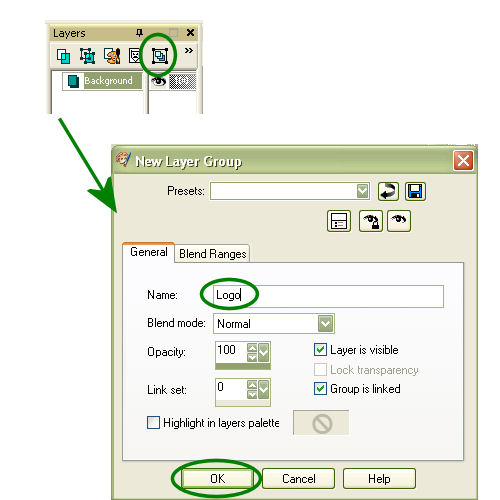
You may have lots of layers like I have, so I recommend creating a folder or Group as they are known.
Photoshop users
Paintshop pro users
)Why use PSD or PSP format?
-With other formats you can't see the layers you created because they have to be merged upon saving. Thus if you find an error or want to update your kit you have to redo it!
-You don't need to create alpha channels if you want part of your image transparent. (This advantage isn't used here.)
-If your logos are too big or too small, with PSD/PSP format you can just change the logo layer (if you follow my tutorial) to what ever size you want.
Example below is of my WA kit that was opened up a few weeks after I made the file! You will notice I still have my layers available and I can move the ING cup logo still. I didn't have to edit redo anything, just move the logo!
---------------------------------------------------------
Programs required
1.fshed005
2. Graphics Editor - Paint Shop Pro or Adobe Photoshop (I will be using Photoshop C2 and there will be some examples for Paint Shop Pro 9)
3. White Kit template
----------------------------------------------------------
Kit Editing tutorial begins!
1. Open the white kit template I plate I provided above.
2. Make a new image (ctrl + N)
3. Make sure your image settings are the same as below.
4. You now have a transparent 1024*1024 image.
5. Now go back to the white kit template you opened in (1). Copy and paste this image into the new image created in (3). (For Paintshop pro users paste it as a new layer.)
6. Create a new layer - Photoshop [Layer > New > Layer] (shift+ctrl+n) or Paintshop pro (Layer > New Raster Layer)
7. You will probably find it easier if you didn't show your white template. Click the eye as shown below. You now shouldn't have a eye for the white template.
Click here to show image
8. Click layer 2 or whatever you called your new layer you created in (6).
9. Use a paint tool to cover the new layer with the MAIN colour of your kit. You will also need to leave the shoes part of the image white. This is shown below.
Click here to show image
10. Change the Layer blending mode to "Multiply". For photoshop users there is an image below. For paint shop pro users go to Layer > Properties > Blend Mode = Multiply.
Click here to show image
11. Re-click the eye so that your white template shows like below.
12. You will want to rotate the image so that it is easier to put stripes or any other features your kit has.
To do this for Photoshop users, click the white template layer, Edit > Rotate 180. Then Edit > Rotate 90 CCW.
For Paintshop pro users, Image > Rotate > Free Rotate > Left and 270.
13. Click Layer 2 (created in step 6) and using your paint brush put on any stripes. This may take a while!
14. Do the opposite of what you did in 12 so that the image is at its original position.
Click here to show image
15. For placing on logos, just find the logo from a website and paste it onto your image. (Paintshop users just ctrl+L)
These will be new layers so you will have to rotate them until they appear in the correct direction. Once that is done resize it and position it where it should be.
16. Save your image as PSD (Photoshop), PSP (Paintshop pro Note: You need to type in .psp at the end of your file name.
You should also be able to save in either format in both prgorams. e.g Paintshop pro users should be able to save the file as a PSD and vice versa.
17. Open Fshed
18. Open the kit you are replacing
19. If you have installed the other image type plugin correctly you will have an option as shown when you click "tools" > Graphic importer should show up.
Click that and a box will appear. Click open.
20. When you click open the image below will appear. Change the image type as shown and find your image you saved in step 16.
21. Save your new fsh file as the same name as when you opened it.
22. You're done!
Click here to show final image
House keeping
You may have lots of layers like I have, so I recommend creating a folder or Group as they are known.
Photoshop users
Paintshop pro users
Last edited: