Hariz
International Cricketer
KIT EDITING TUTORIAL
I shall try to make it as easy as possible, with explainations at every point. Still feel free to ask questions. This tutorial has been made by me to encourage new patch makers towards editing BLIC kits. I shall try and make a face making tutorial as well.
Things you require
1. A good source photo of the kit to be made, with all logos/text clearly visible.
2. A photo editing program like Paint Shop pro or Photoshop (I shall be using Photoshop CS2). Photoshop uses the .dds plugin, download it here
3. Baggie Studios to import the .dds files into the .bag and into the game.
Making the Kit
I shall explain this by making the new South African odi kit.Please note that in BLIC a kit consists of many parts that include two shirts (long and short sleeved), two jumpers, (long and short sleeved) and three types of trousers (bowling, left and right batting). There are also the BITS (fielding cap and pads) and BITS2 (fielding hat, gloves)files. You need to edit all these for a kit to be complete and that is why the kit editing in BLIC is time consuming.
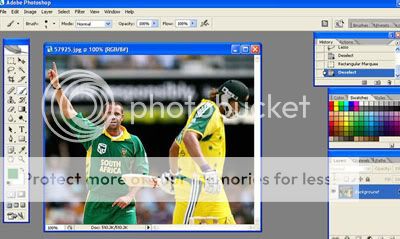
I am using this photo of Andrew Hall, as one can have a clear view of what logos are used and what colour is the kit. More than one pictures can also be used if necessary.
I have attached the templates below.
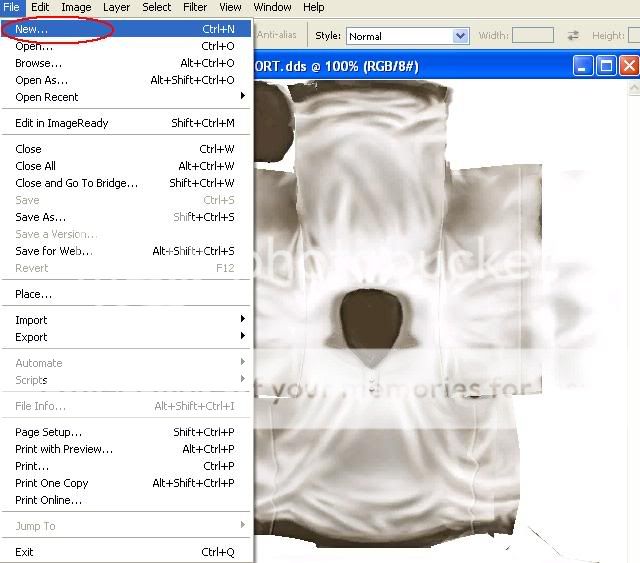
First of all open the relevant .dds file you want to edit in the photo editing program.
Ist method of making the base kit
Then select File>New to get a new image.
Select the following settings for the new image and click on OK.

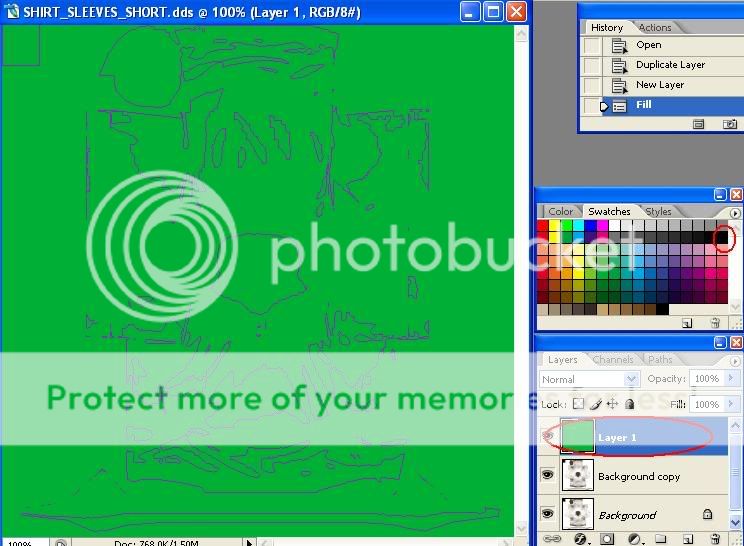
Select a green colour from the swatches that you want or use the eye droper tool to choose colour from a picture. Now select Edit>Fill and the new image will take that colour.
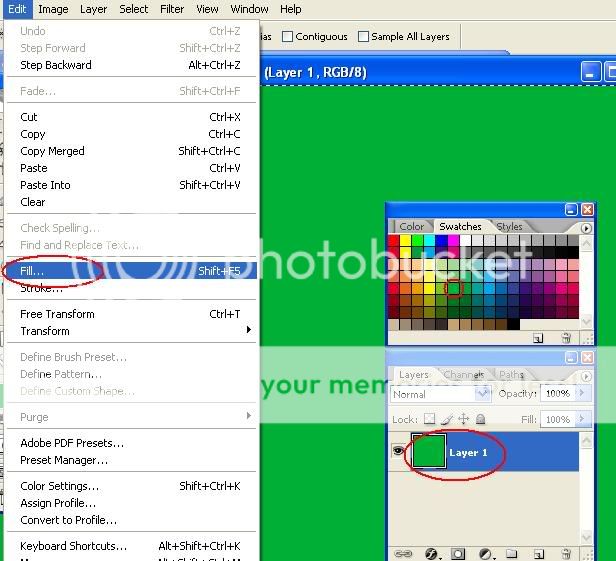
Now select the entire image and copy onto your already opened kit template, it will turn complete green. Now select this second layer and right-click on it to get the options below. Select Blending options.

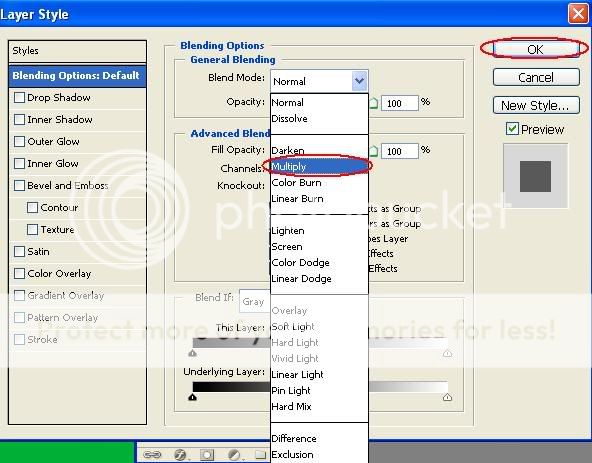
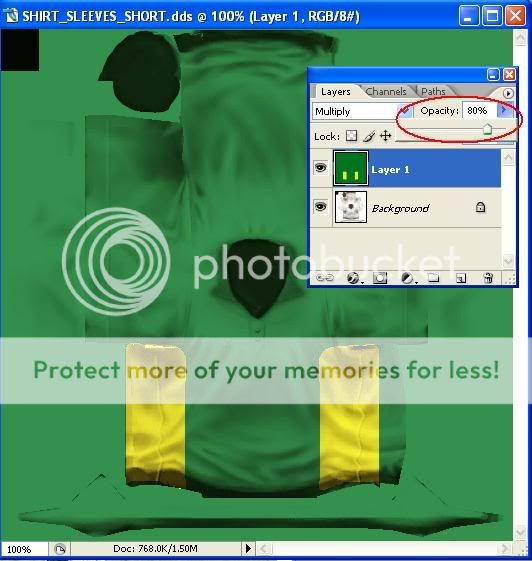
Now change the mode above from Normal to Multiply, so that you get the creases/foldes on your kit with your own colour.
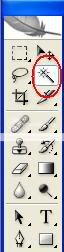
Use the Magic wand tool to select a certain part on the kit and when successfully selected, select the required colour from the swatches. Then go to Edit>Fill and fill in the desired colour.
When successfull on one side, repeat above process on the other side to get something like this.
Now the main part is done. Use the opacity tool to get the colour of the real kit or change the colour entirely by selecting other swatches. Here I got it just by changing the opacity a bit.
2nd method of making the base kit
Now the method described above is one way of getting the creases/foldes on your desired kit. Another way is following :
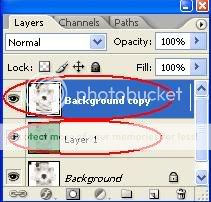
Make a Background copy of the original layer which is locked. Do this by going to Layer>Duplicate Layer. Now Make a second layer upon the opened .dds kit template.
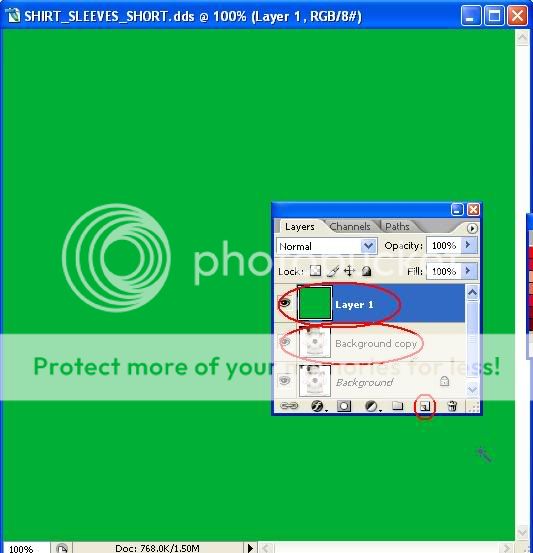
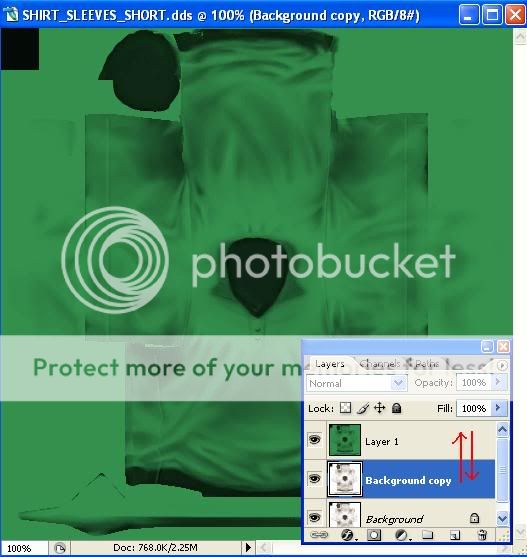
Now move the Background copy layer above the new green coloured layer.
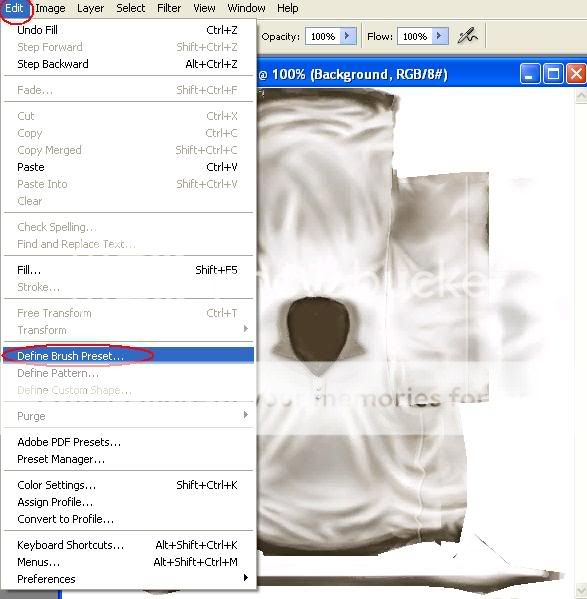
Select the Background copy layer and go to Edit>Define Brush Preset and now select the brush, it will have the pattern of the kit.
Select a dark colour from the swatches, mostly I use Black and then add the pattern of the kit onto your second layer which is coloured green. Be sure that layer is selected.
Now you change the position of the layers in the layers window and you get your finished kit with creases.
Now its the turn for other patterns like stripes, crosses etc. This part is simple, as you have to simply make new layers and select the Magic wand tool to select a paricular area and fill it with a desired colour.
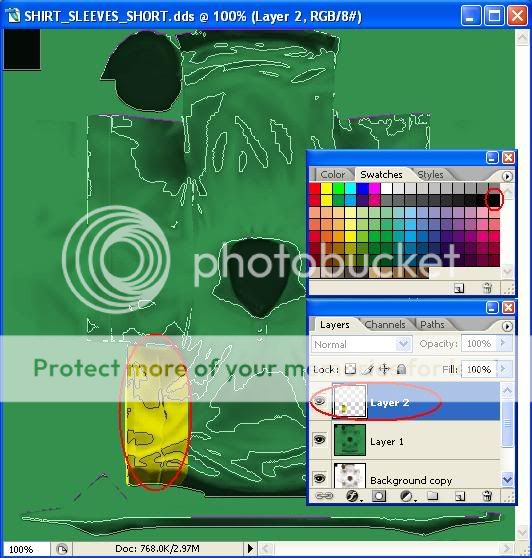
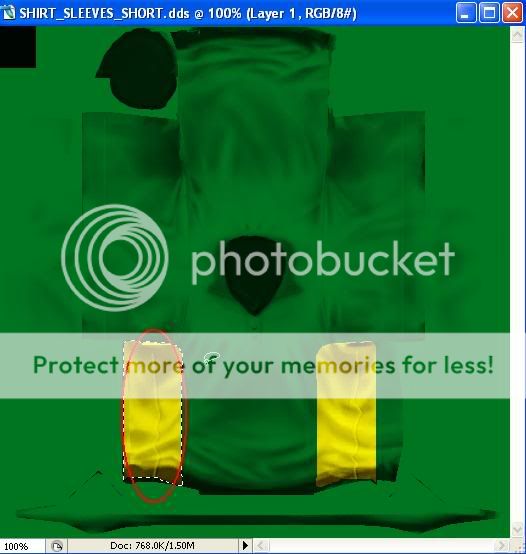
In the pic above I used the Magic wand tool to select the area that comes under the arm and used Edit>Fill to colour it yellow and then used the same pattern brush to put creases on this layer. With this method of making the base kit everything uses a seperate layer, which is convenient by making changes or updating any kit.

I again used the Magic wand tool to select the wedge shaped piece to create this shape on the yellow part. You can now copy/paste this layer to make more of these which appear on the SA kit.
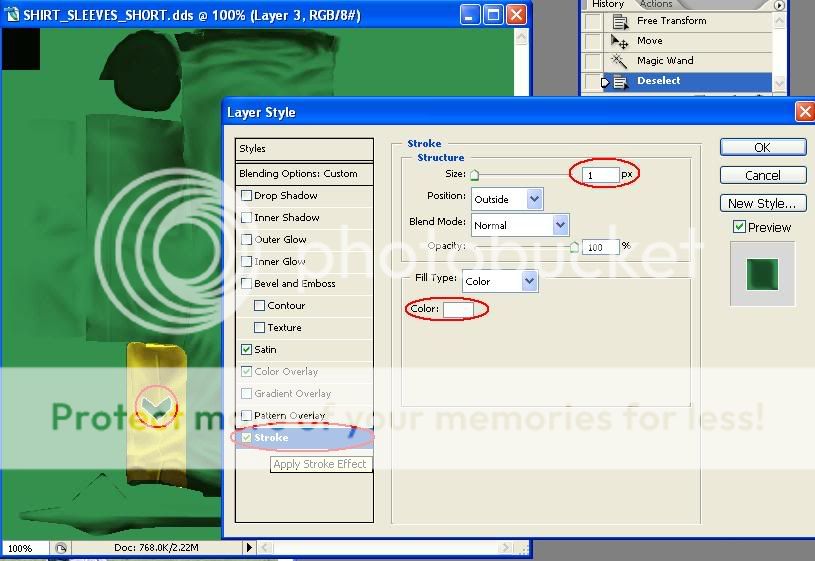
You can use the stroke option on any layer to give it a boundary having any colour and particular pixel strength.

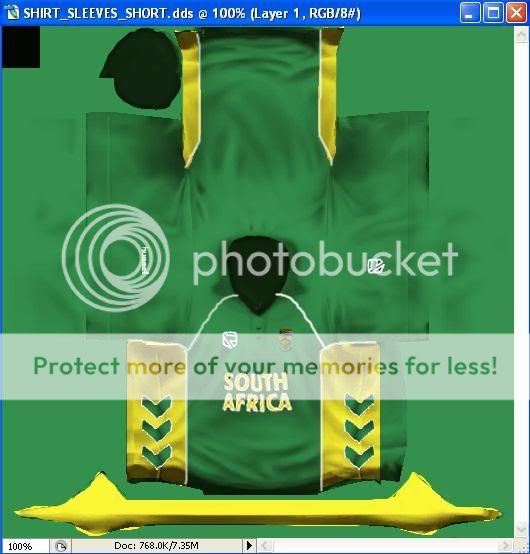
Cut out the logos from the original pic if the pic is good, otherwise google them and resize them appropriately, so that they fit on the arms. You have to check a couple of times for long sleeves shirt/jumper because the arm logos there get all streched, if they are too big. Same is the case with the front of both short and long sleeved jumpers.
In the end, if all logos placed correctly you should get something like this.
Now do this with every part of the kit, as mentioned above and in the end save each file as psd (photoshop format) files as well as .dds files using 6 mipmaps with the .dds.
Importing using Baggie Studios
Open Baggie Studios and then select Open>X:/ProgramFiles/Codemasters/BrianLaraInternationalCricket2005/
Data/Teams and select the team's .bag file you have made. SA in my case.

The teams use the kit with the extension ....................AltODI.bag in exhibition so I mostly replace the files in them. Replace every .dds one by one by locating it on your hard disk.
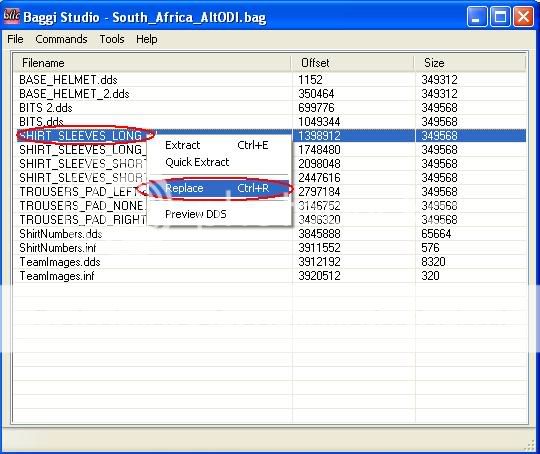
Replace every file and then close Baggie Studios.

Well you are finally done. Now play the game and check the kit out if everything has been put on the right spot and if you find mistakes, its not that bad, as you have also saved the psd files where all layers are saved and you just have to correct the relevant layer.
OK you are a Kit maker for BLIC now :happy :happy . I hope this Tutorial was well written and I explained everything in detail. If you still have questions please post in this thread.
I shall try to make it as easy as possible, with explainations at every point. Still feel free to ask questions. This tutorial has been made by me to encourage new patch makers towards editing BLIC kits. I shall try and make a face making tutorial as well.
Things you require
1. A good source photo of the kit to be made, with all logos/text clearly visible.
2. A photo editing program like Paint Shop pro or Photoshop (I shall be using Photoshop CS2). Photoshop uses the .dds plugin, download it here
3. Baggie Studios to import the .dds files into the .bag and into the game.
Making the Kit
I shall explain this by making the new South African odi kit.Please note that in BLIC a kit consists of many parts that include two shirts (long and short sleeved), two jumpers, (long and short sleeved) and three types of trousers (bowling, left and right batting). There are also the BITS (fielding cap and pads) and BITS2 (fielding hat, gloves)files. You need to edit all these for a kit to be complete and that is why the kit editing in BLIC is time consuming.
I am using this photo of Andrew Hall, as one can have a clear view of what logos are used and what colour is the kit. More than one pictures can also be used if necessary.
I have attached the templates below.
First of all open the relevant .dds file you want to edit in the photo editing program.
Ist method of making the base kit
Then select File>New to get a new image.
Select the following settings for the new image and click on OK.
Select a green colour from the swatches that you want or use the eye droper tool to choose colour from a picture. Now select Edit>Fill and the new image will take that colour.
Now select the entire image and copy onto your already opened kit template, it will turn complete green. Now select this second layer and right-click on it to get the options below. Select Blending options.
Now change the mode above from Normal to Multiply, so that you get the creases/foldes on your kit with your own colour.
Use the Magic wand tool to select a certain part on the kit and when successfully selected, select the required colour from the swatches. Then go to Edit>Fill and fill in the desired colour.
When successfull on one side, repeat above process on the other side to get something like this.
Now the main part is done. Use the opacity tool to get the colour of the real kit or change the colour entirely by selecting other swatches. Here I got it just by changing the opacity a bit.
2nd method of making the base kit
Now the method described above is one way of getting the creases/foldes on your desired kit. Another way is following :
Make a Background copy of the original layer which is locked. Do this by going to Layer>Duplicate Layer. Now Make a second layer upon the opened .dds kit template.
Now move the Background copy layer above the new green coloured layer.
Select the Background copy layer and go to Edit>Define Brush Preset and now select the brush, it will have the pattern of the kit.
Select a dark colour from the swatches, mostly I use Black and then add the pattern of the kit onto your second layer which is coloured green. Be sure that layer is selected.
Now you change the position of the layers in the layers window and you get your finished kit with creases.
Now its the turn for other patterns like stripes, crosses etc. This part is simple, as you have to simply make new layers and select the Magic wand tool to select a paricular area and fill it with a desired colour.
In the pic above I used the Magic wand tool to select the area that comes under the arm and used Edit>Fill to colour it yellow and then used the same pattern brush to put creases on this layer. With this method of making the base kit everything uses a seperate layer, which is convenient by making changes or updating any kit.
I again used the Magic wand tool to select the wedge shaped piece to create this shape on the yellow part. You can now copy/paste this layer to make more of these which appear on the SA kit.
You can use the stroke option on any layer to give it a boundary having any colour and particular pixel strength.
Cut out the logos from the original pic if the pic is good, otherwise google them and resize them appropriately, so that they fit on the arms. You have to check a couple of times for long sleeves shirt/jumper because the arm logos there get all streched, if they are too big. Same is the case with the front of both short and long sleeved jumpers.
In the end, if all logos placed correctly you should get something like this.
Now do this with every part of the kit, as mentioned above and in the end save each file as psd (photoshop format) files as well as .dds files using 6 mipmaps with the .dds.
Importing using Baggie Studios
Open Baggie Studios and then select Open>X:/ProgramFiles/Codemasters/BrianLaraInternationalCricket2005/
Data/Teams and select the team's .bag file you have made. SA in my case.
The teams use the kit with the extension ....................AltODI.bag in exhibition so I mostly replace the files in them. Replace every .dds one by one by locating it on your hard disk.
Replace every file and then close Baggie Studios.
Well you are finally done. Now play the game and check the kit out if everything has been put on the right spot and if you find mistakes, its not that bad, as you have also saved the psd files where all layers are saved and you just have to correct the relevant layer.
OK you are a Kit maker for BLIC now :happy :happy . I hope this Tutorial was well written and I explained everything in detail. If you still have questions please post in this thread.
Attachments
Last edited:
") :cool:
:cool: